

WhatsApp Business
In one line: Connect the official Meta WhatsApp Cloud API so your UnleashX agent can send text, template, image, document, audio, and video messages to your customers on WhatsApp.
1. Overview
WhatsApp Business (via Meta’s WhatsApp Cloud API) is the official way for companies to message customers on WhatsApp — sending order updates, reminders, support replies, and approved marketing templates from a verified business number. Once connected to UnleashX, your agent can send plain text messages, pre-approved templates (with variables), images, documents, audio/voice notes, and videos, and mark inbound messages as read — all through your own WhatsApp Business number. Connecting this to UnleashX lets your agent automate customer communication end to end: trigger a template when an event happens, reply with a document on request, or send a voice note — using the same compliant Cloud API that Meta requires for business messaging.2. What you’ll need
- A Meta for Developers account and a Meta App with the WhatsApp product added.
- A WhatsApp Business Account (WABA) and a registered business phone number.
- Three values from the Meta dashboard: an access token, your Phone Number ID, and your WhatsApp Business Account ID (WABA ID).
- Approved message templates if you plan to send template messages (Meta must approve these in advance).
If you don’t manage the Meta App yourself, ask whoever administers your company’s Meta Business / WhatsApp setup to add you as an app admin or to share the access token, Phone Number ID, and WABA ID.
3. Get your credentials
To connect, UnleashX needs three values from Meta: an Access Token, a Phone Number ID, and a WhatsApp Business Account ID (WABA ID). Getting them means setting up the official Meta WhatsApp Cloud API — no Twilio, WATI, or AiSensy needed.Already have WhatsApp Cloud API running? Skip ahead to Step 8 — Collect your three values. The steps below are the full setup from scratch.
How the pieces fit together
Each thing you create unlocks the next. This is the chain you’ll build:Set it up step by step
1
Create a Meta Developer account
Go to Meta for Developers and log in with your Facebook account. Click Get Started, verify your email, turn on two-factor authentication if asked, and accept the developer terms. You now have a developer account.
2
Create a Meta Business Portfolio
Open Meta Business Settings and create your business portfolio — your business name, email, website, and address. This is the entity that will own your WhatsApp Business Account, and it has its own Business portfolio ID.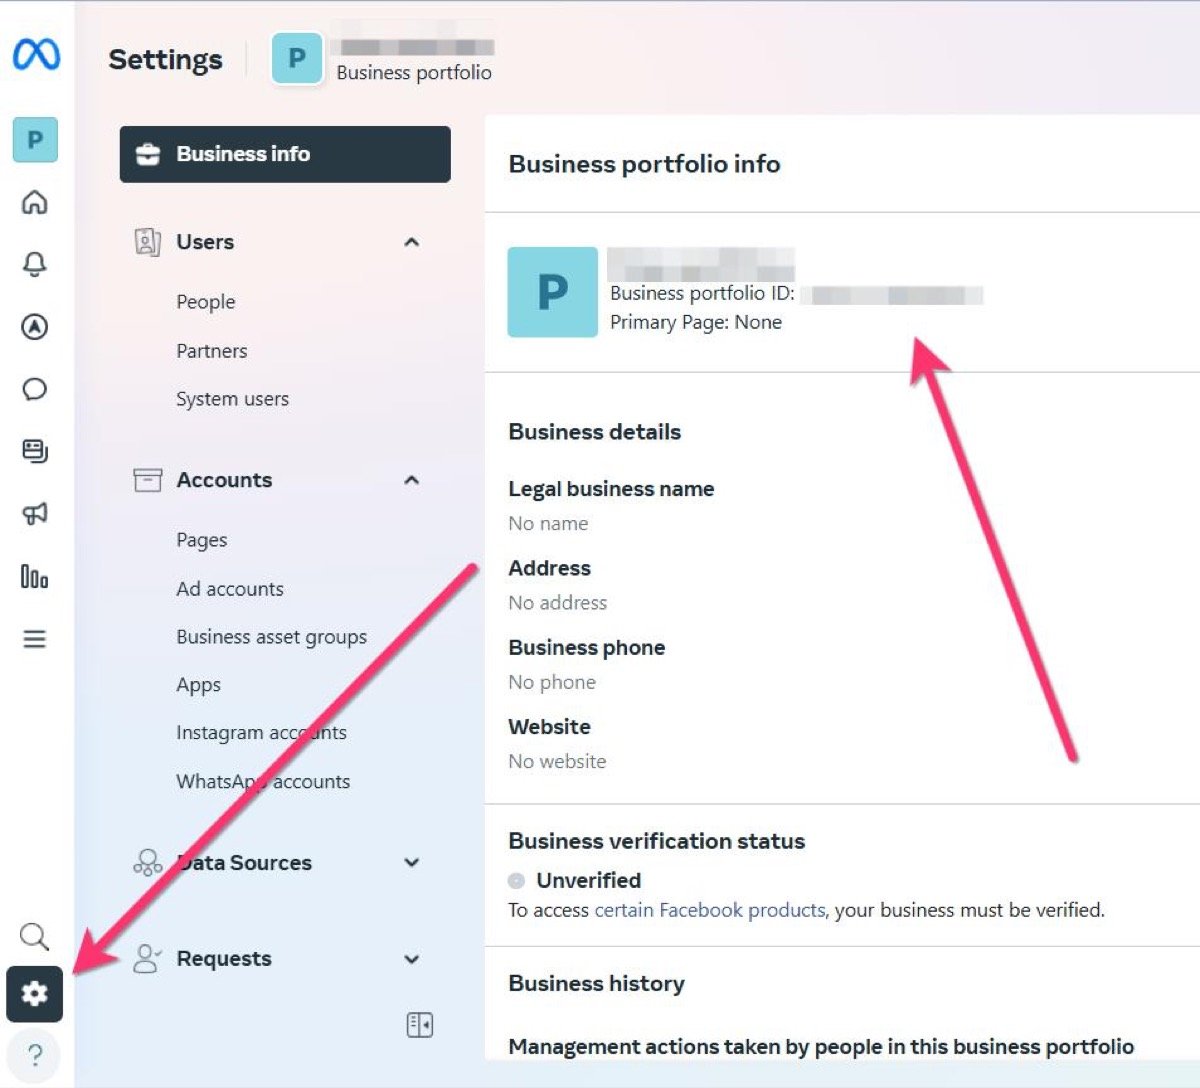
3
Verify your business (recommended)
In Business Settings → Security Center, click Start verification and upload your business documents (for example a registration certificate, GST certificate, or a utility bill).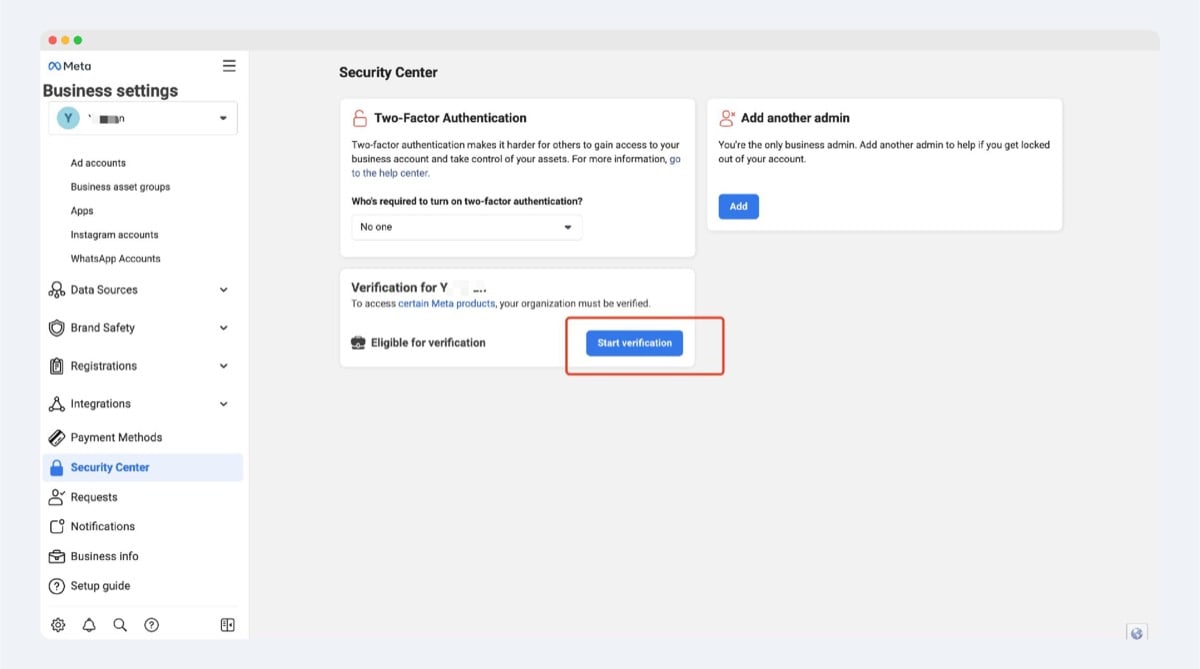
Verification isn’t required to test, but it is required for production use and for higher messaging limits — so it’s worth doing early.
4
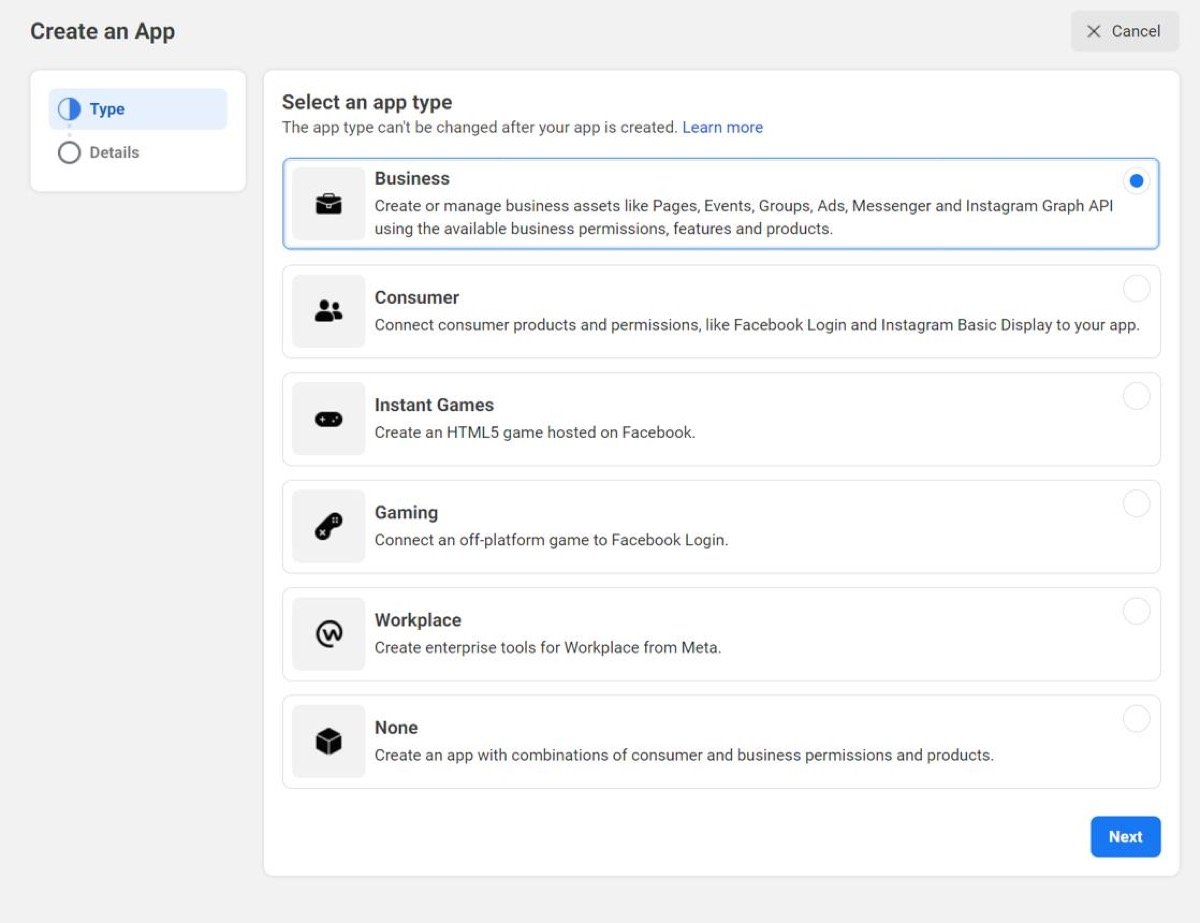
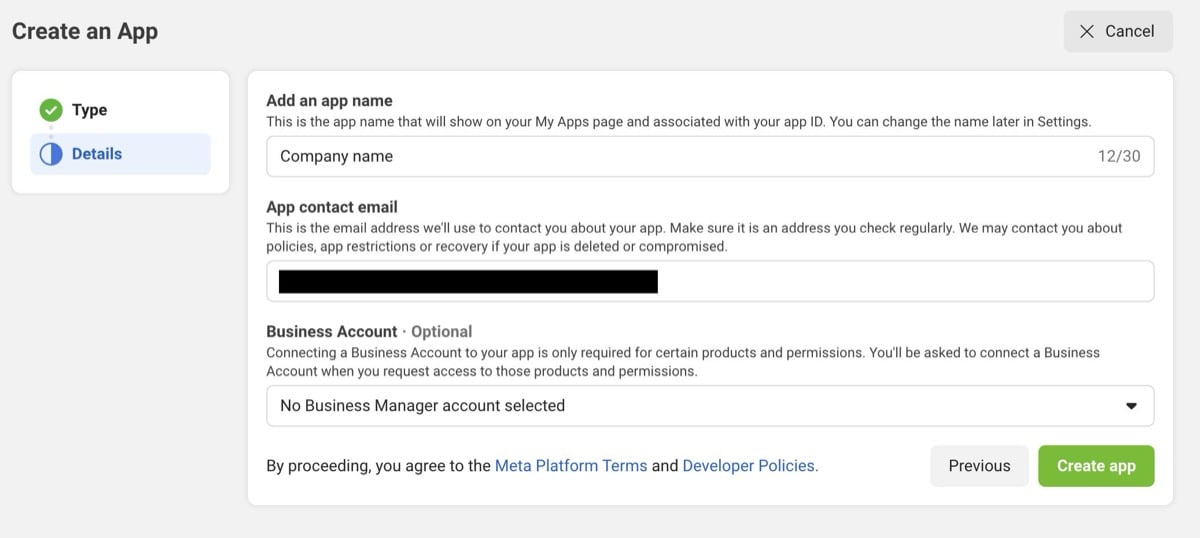
Create a Meta App
Go to your Apps dashboard and click Create App.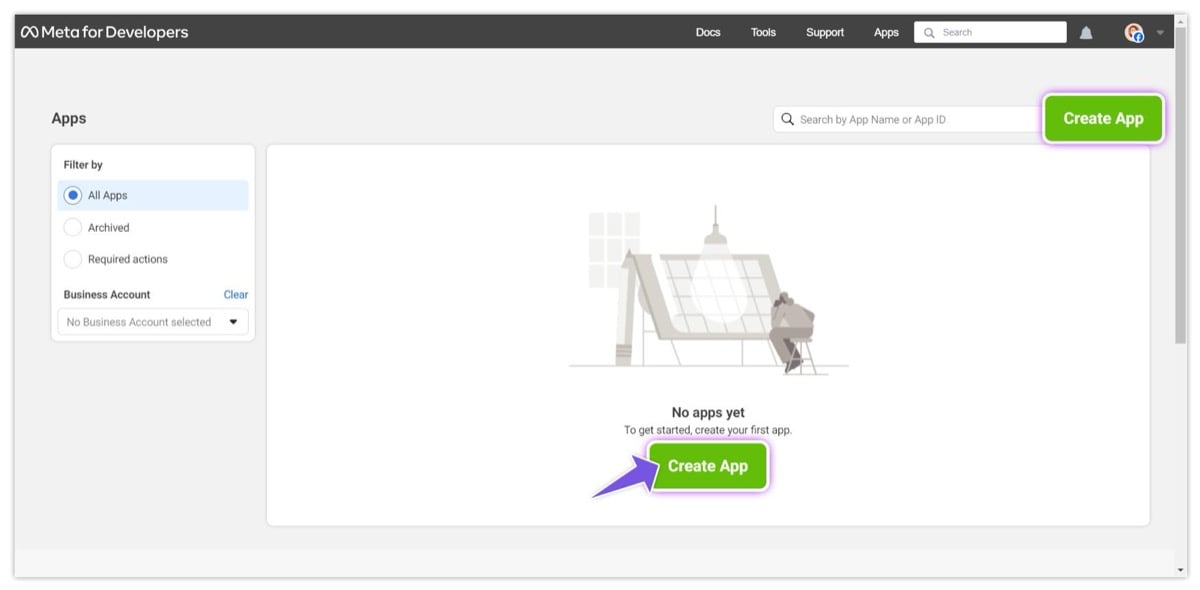
5
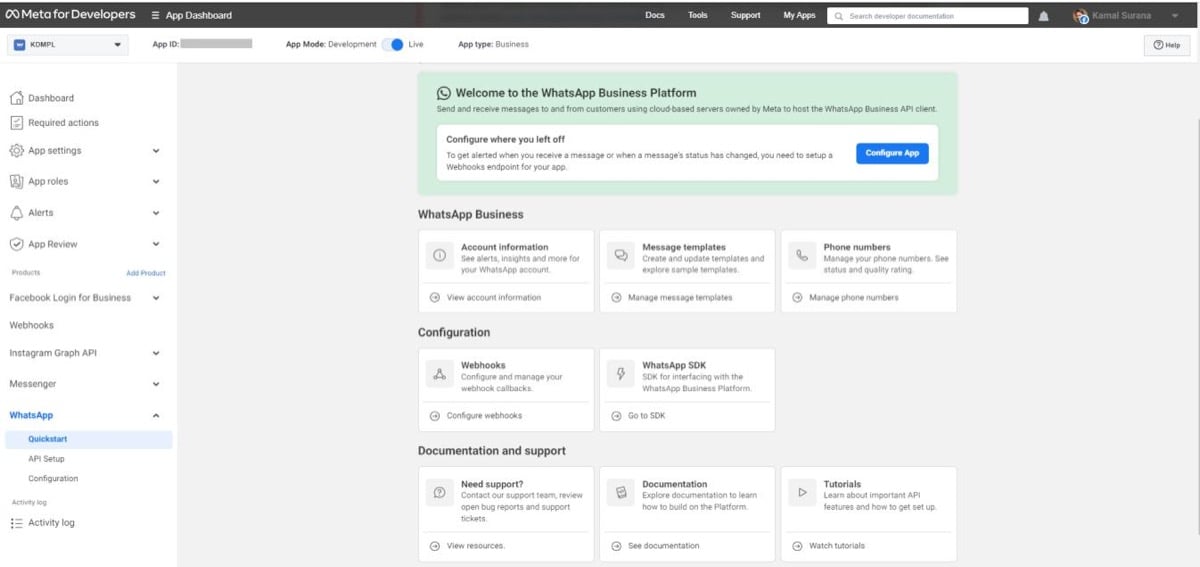
Add the WhatsApp product
Inside the app, find Add Product, locate WhatsApp, and click Set up.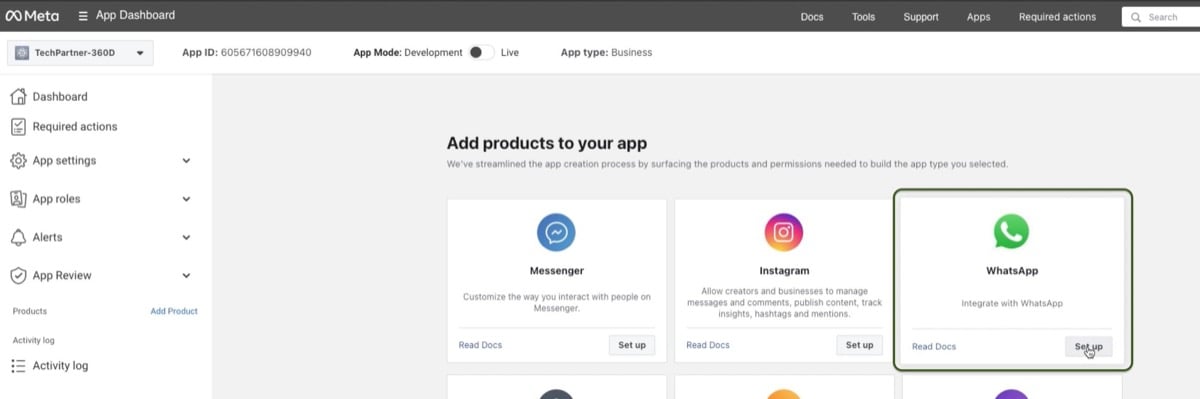
6
Send a test message (optional)
Want to confirm it works before going further? Open WhatsApp → API Setup (or Getting Started). It shows a temporary access token, your test Phone Number ID, and your WhatsApp Business Account ID, plus a ready-made 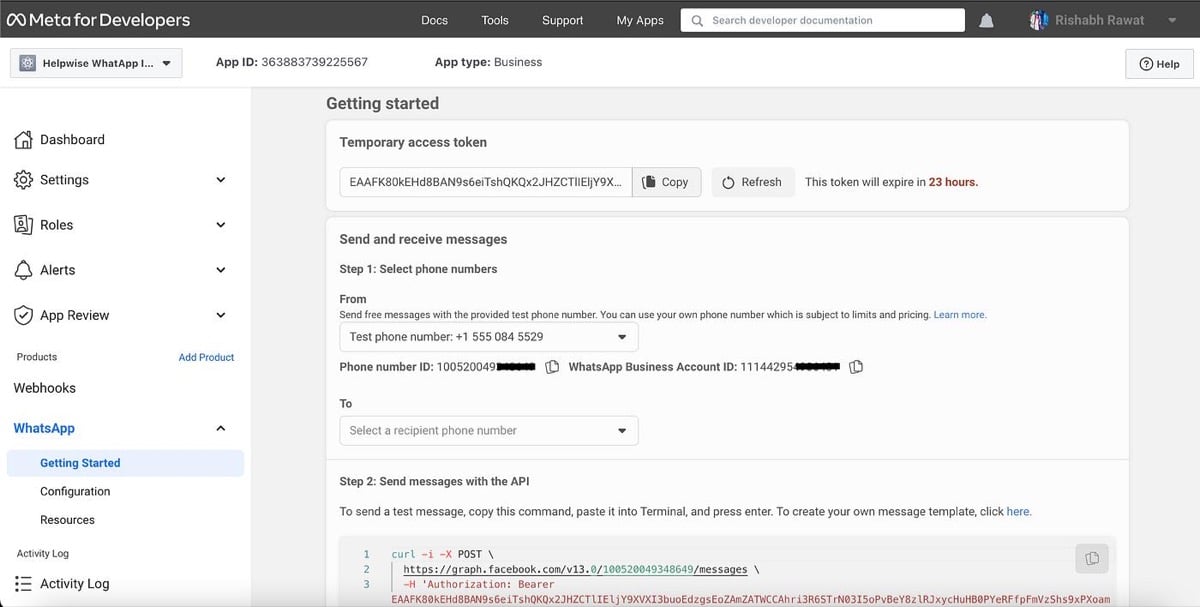
curl command and a Send message button.7
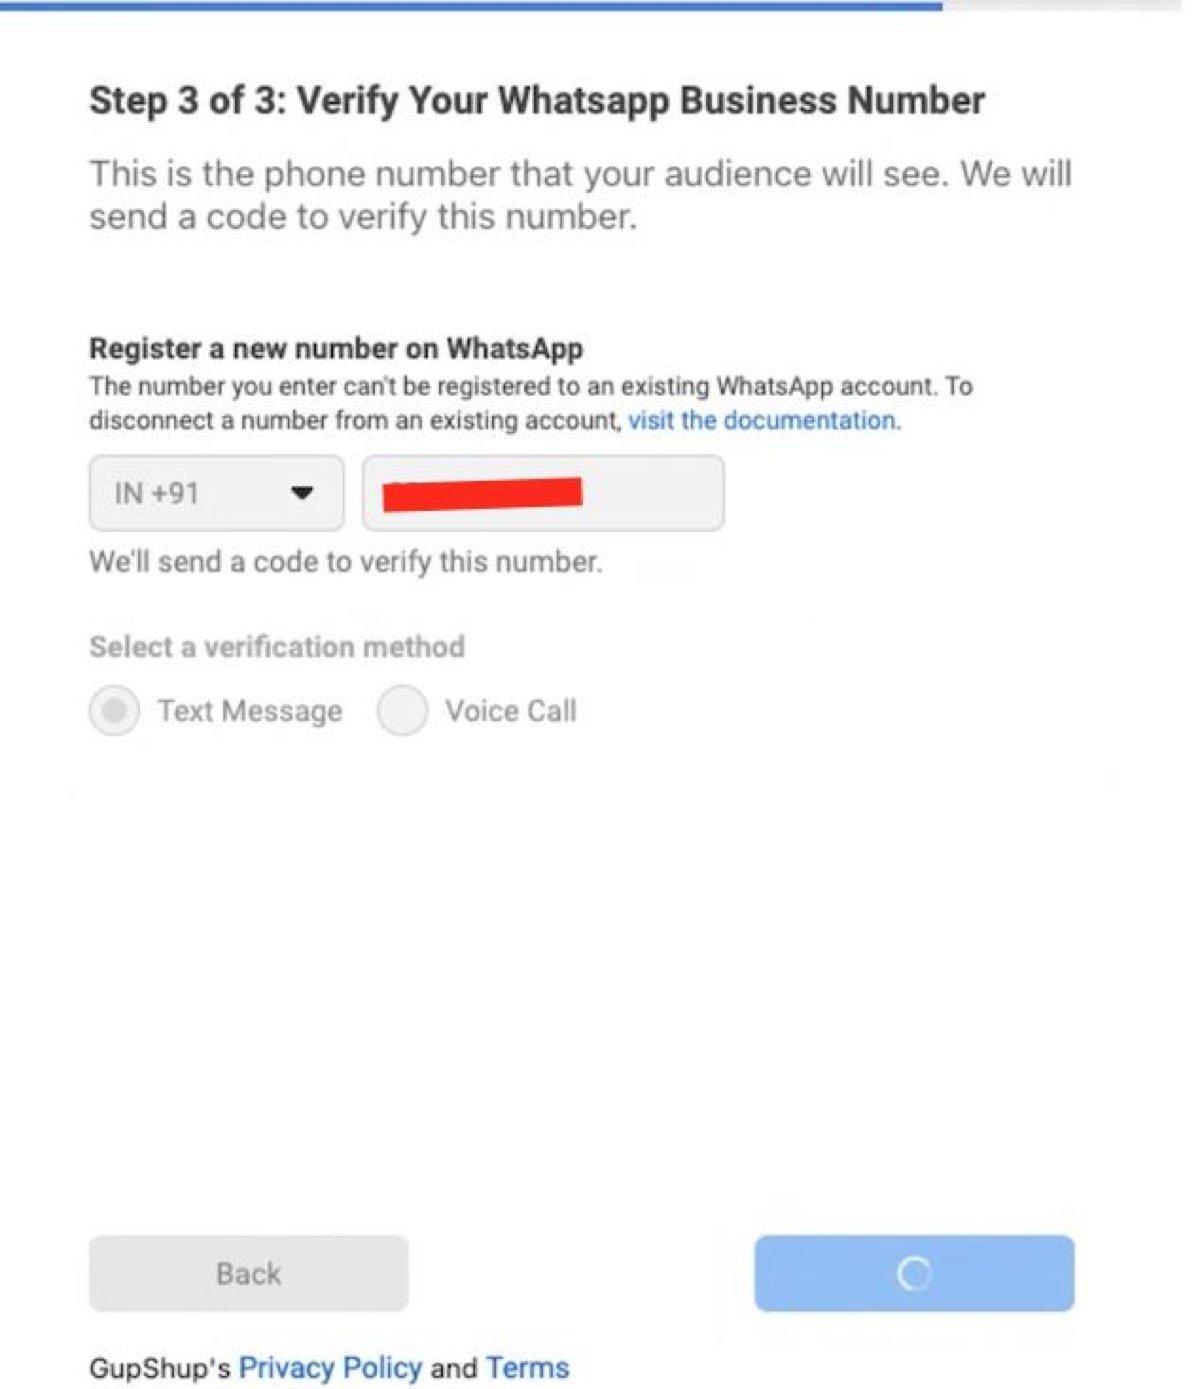
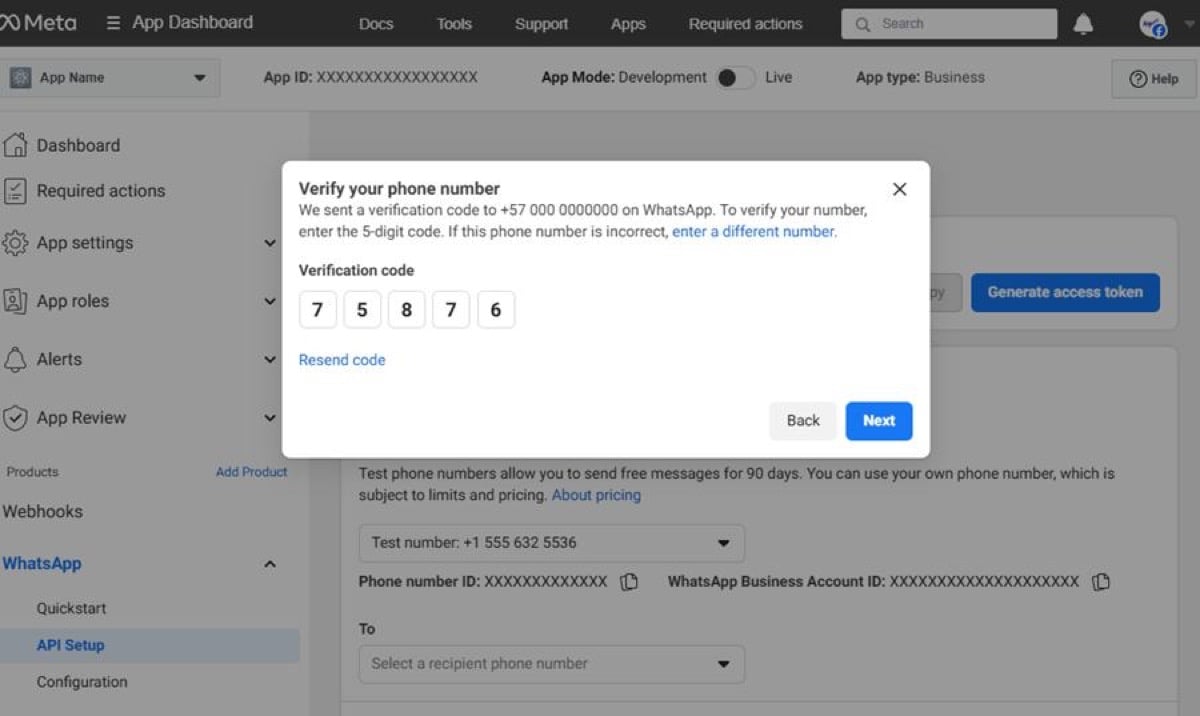
Add your real phone number
In WhatsApp → API Setup, scroll to Add a phone number and click Add phone number.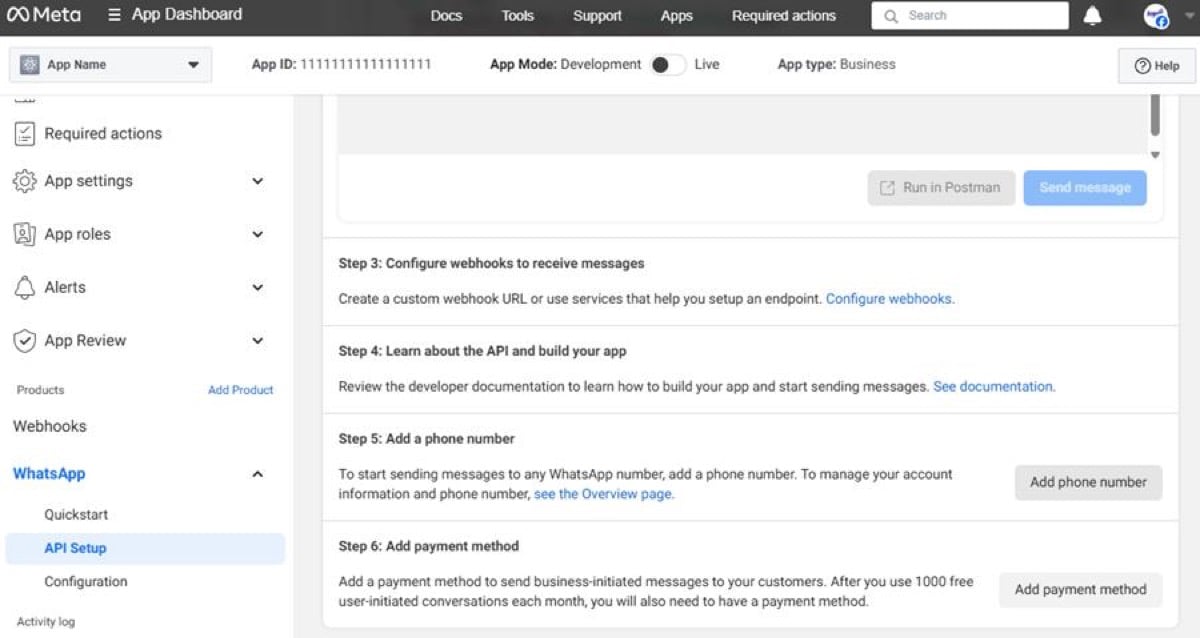
8
Collect your three values
Once the real number is added, copy these from the API Setup page (and from Business Settings → Accounts → WhatsApp Accounts). These are exactly what UnleashX asks for: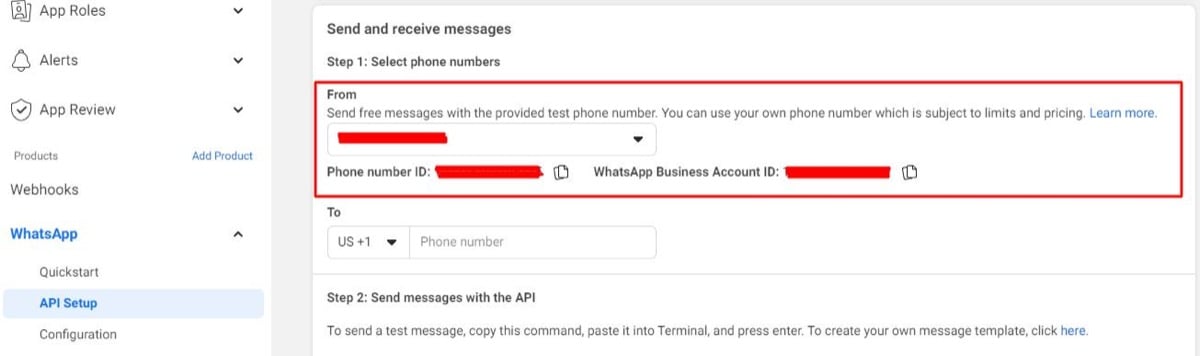
9
Create a permanent access token
The temporary token expires in about 24 hours, so create a permanent one for production.1. Add a System User. Go to Business Settings → Users → System Users and click Add. Name it (e.g. 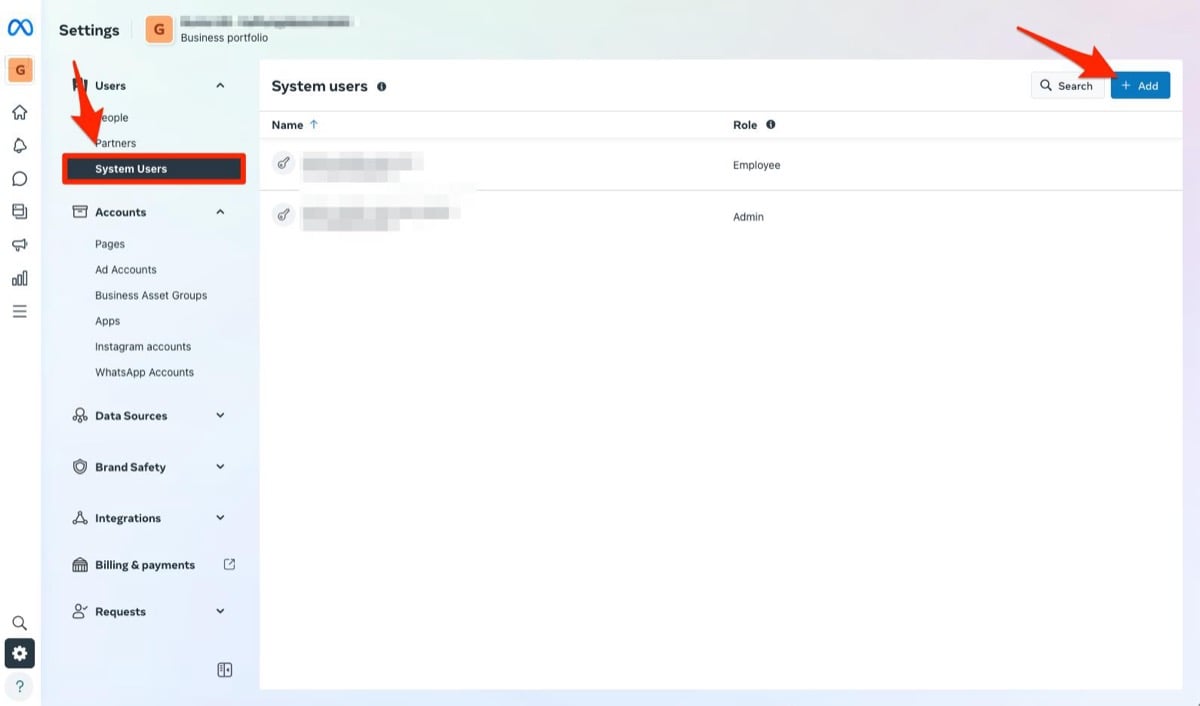
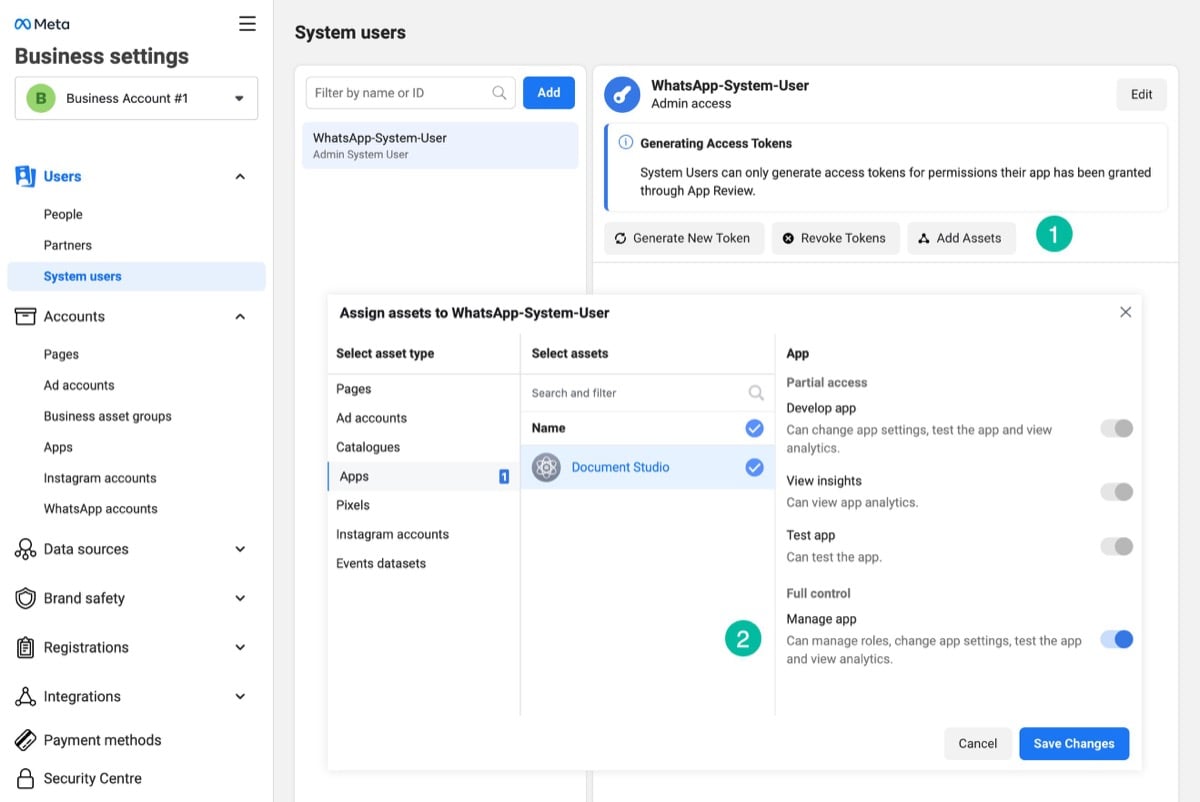
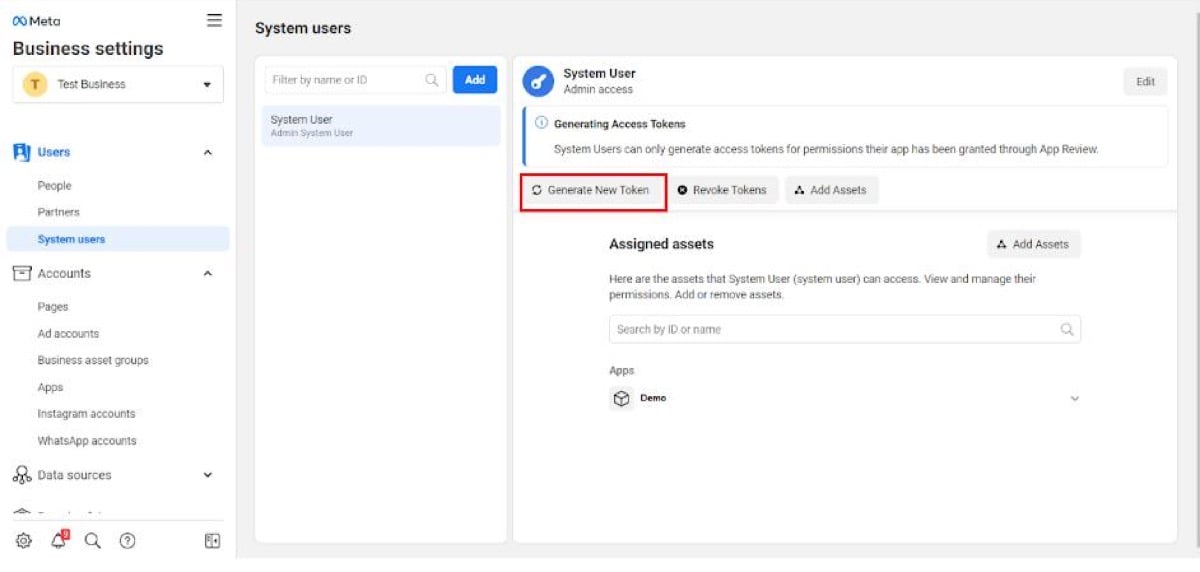
whatsapp-api) with the Admin role.-
whatsapp_business_messaging -
whatsapp_business_management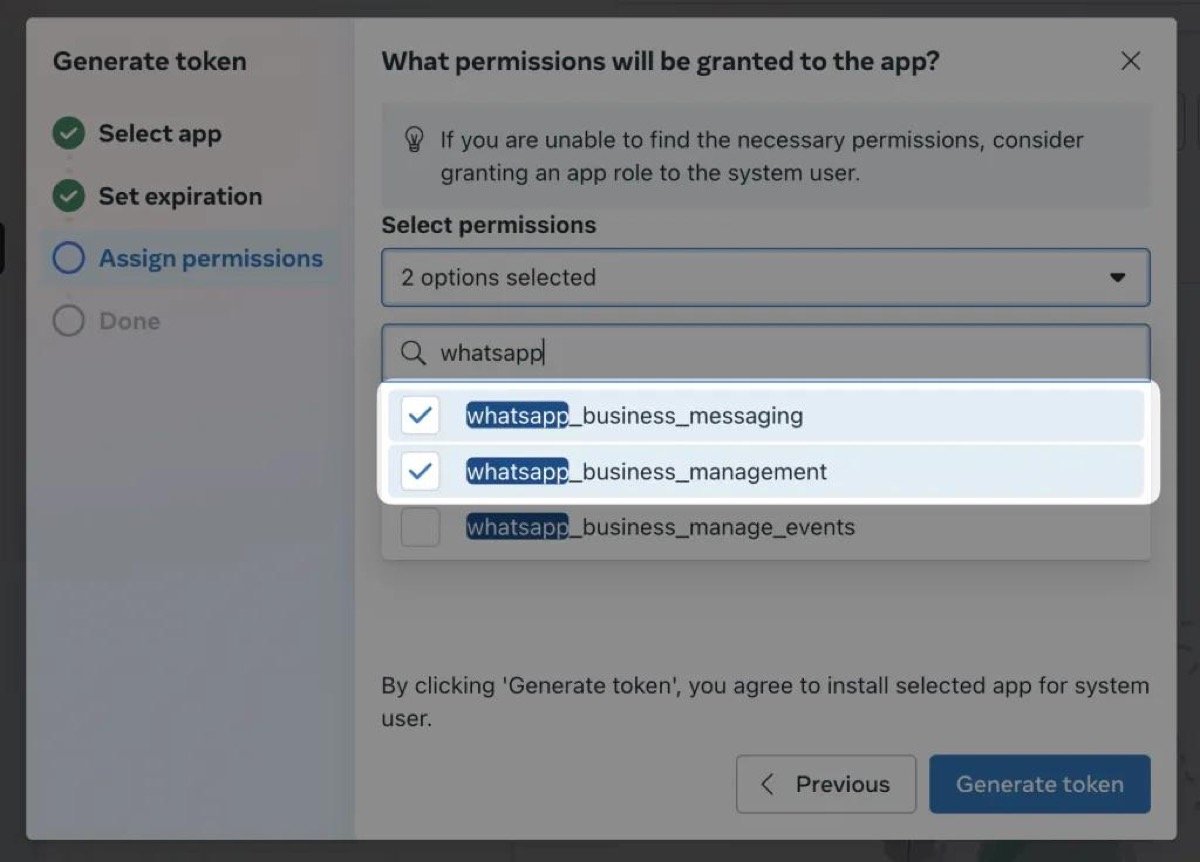
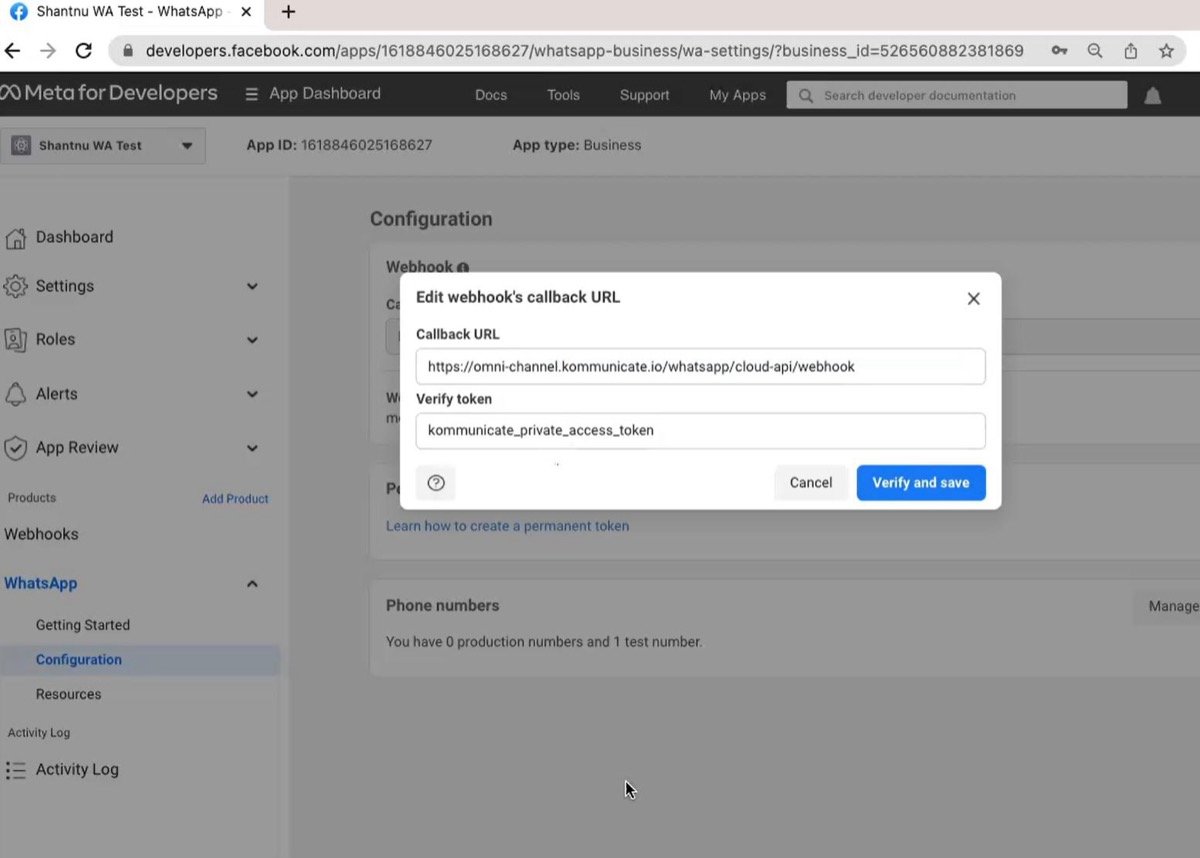
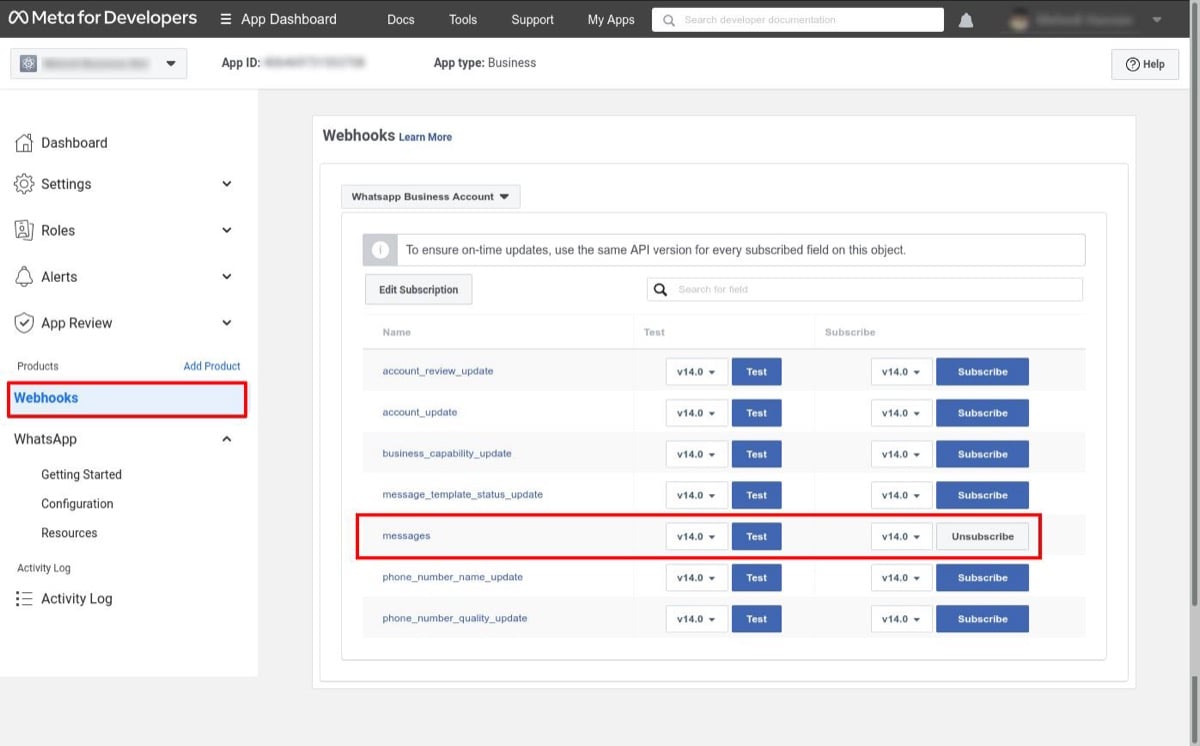
About webhooks (receiving messages): sending messages needs only the three values above. To receive inbound messages into a workflow, use the Webhook trigger in Workflows — UnleashX gives you a callback URL to paste into WhatsApp → Configuration in Meta. You don’t need to build your own server.Open WhatsApp → Configuration and click Edit next to the Webhook callback URL.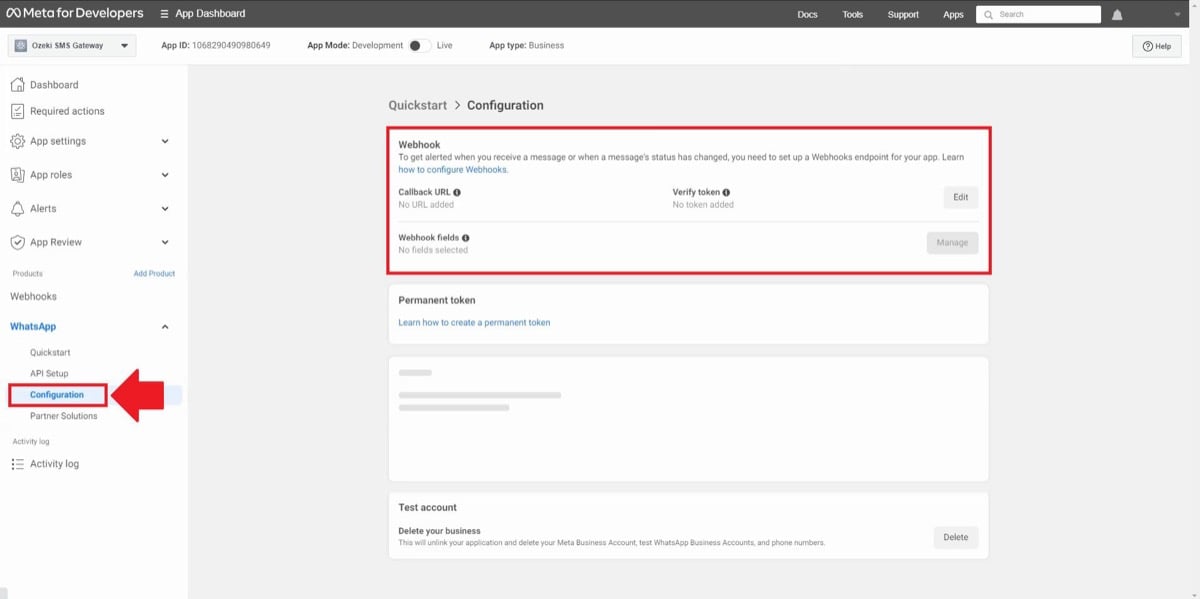
4. Connect on UnleashX
1
Open your agent
Sign in at tryunleashx.com and open the agent you want to connect.
2
Go to Data Connectors
Open Data Connectors inside the agent.
3
Find WhatsApp Business and Configure
Locate WhatsApp Business and click Connect / Add / Configure.
4
Paste your credentials
Enter your access token, Phone Number ID, and WABA ID from Section 3, then save.
5
Confirm it's connected
The connector shows a Connected badge once your credentials validate. You’re ready to send.
Use WhatsApp Business in a Workflow
Once connected, you can add WhatsApp Business to any automation from the Workflows builder. Its triggers and tools appear in the Apps panel, marked with an MCP badge.1
Add a trigger or action node
Open Workflows → New Workflow. On the canvas, click + Add Trigger (or the + below any node) to add a step.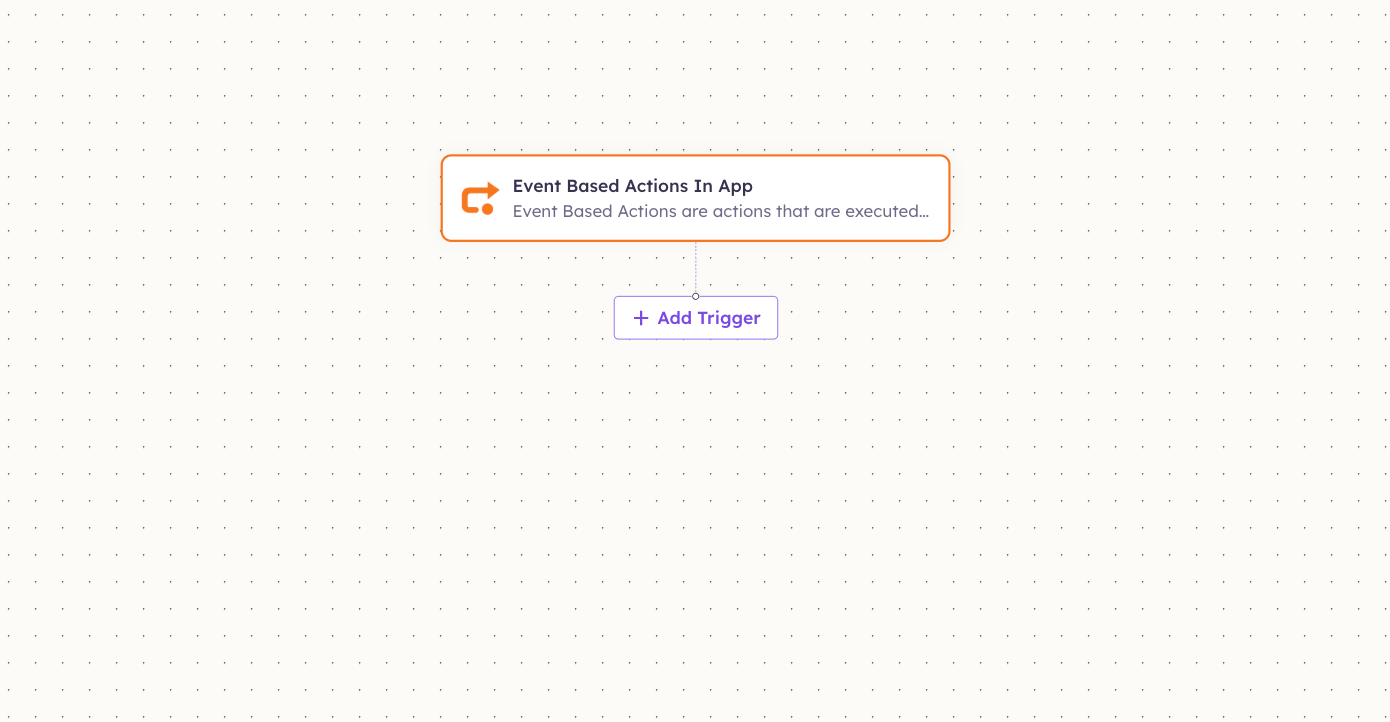
2
Pick WhatsApp Business from the Apps panel
In the Paths panel, open the Apps tab and select WhatsApp Business. Use the search box if you have many connectors.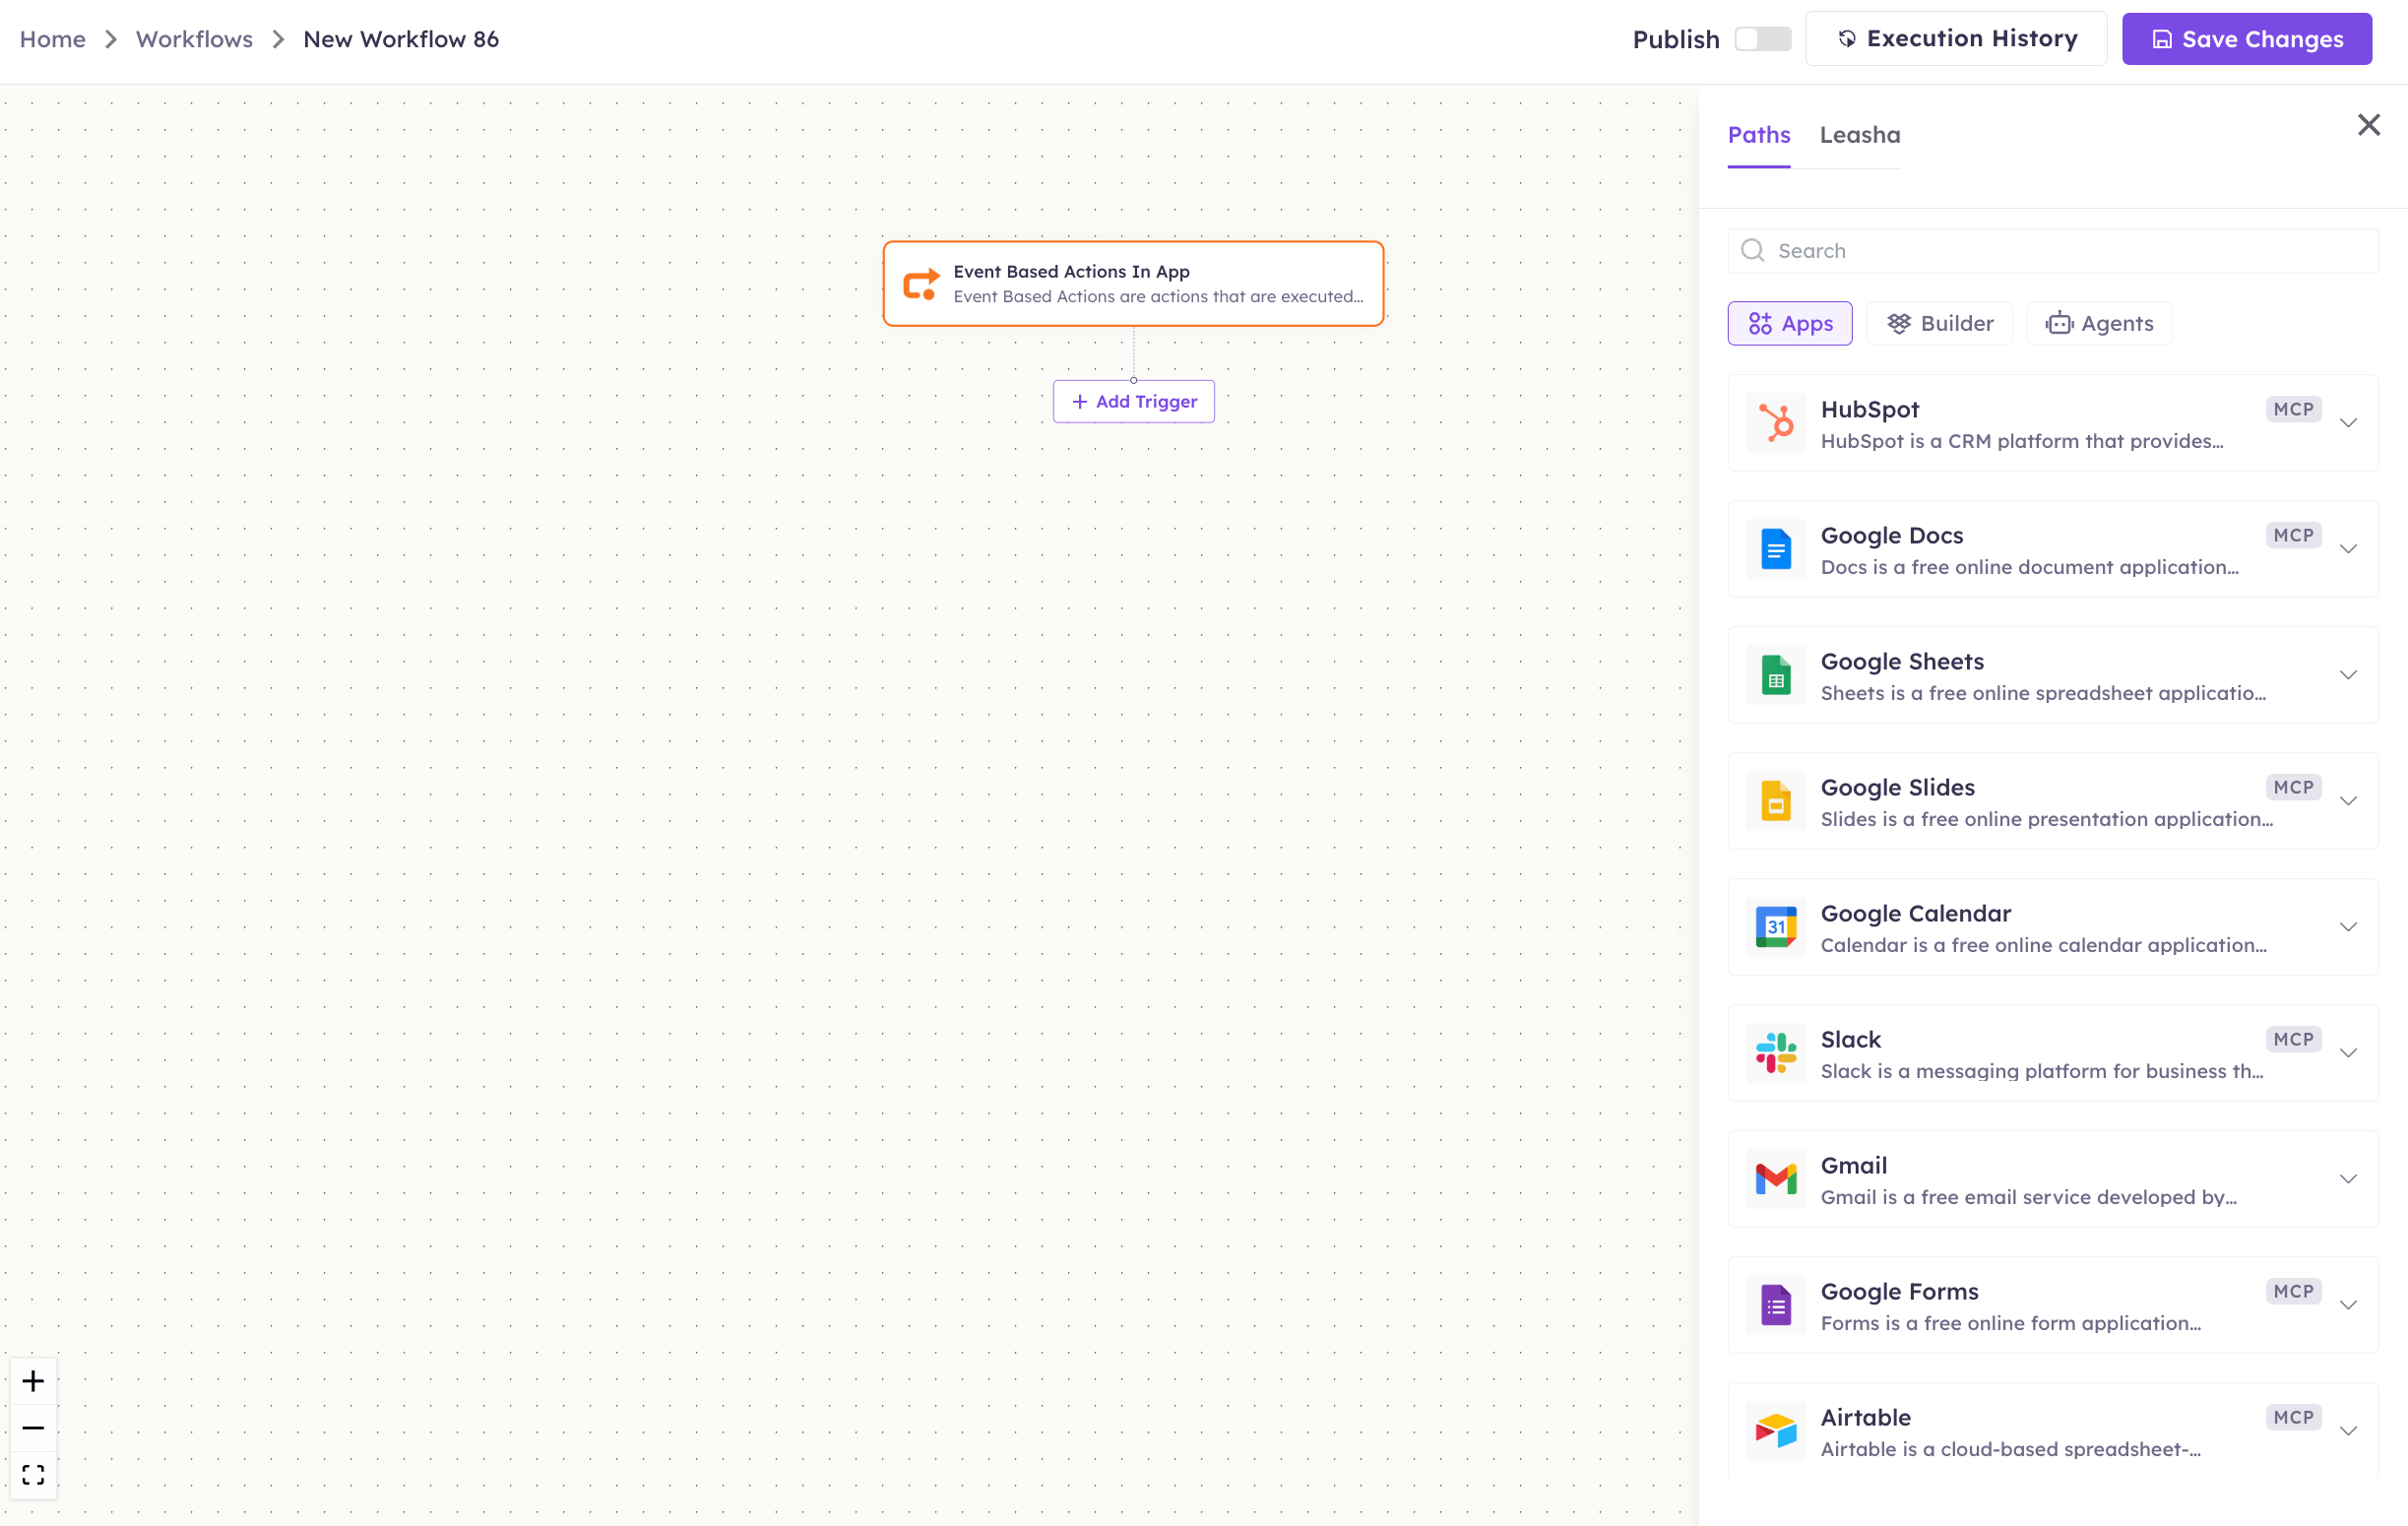
3
Choose a trigger or tool
Pick the trigger or action you want. Configure its fields — required fields are marked with a red asterisk (*).
4
Add or select your account
Under Selected account, choose an already-connected account, or click Add Account to connect one now.
5
Save and test
Fill in the remaining fields and click Save. Use Test to verify the step, then toggle Publish when the workflow is ready.
The steps are the same for every connector. For the full workflow builder guide, see Using MCP in Workflows.
5. Available tools
Get Insurance Detail and Zimyo Employee Detail are helper lookups bundled into this server for specific business workflows (insurance quoting and HR employee lookup). They don’t send WhatsApp messages themselves.
6. Example usage
“Text +91 98765 43210 their order #4521 has shipped.” Behind the scenes: Send Message (UnleashX normalizes the number and posts to the Cloud API). “Send the ‘appointment_reminder’ template to this customer for 3 PM tomorrow.” Behind the scenes: List Templates (confirm the template) → Send Template (with the time as a variable).7. Permissions & data access
UnleashX CAN:- Send text, template, image, document, audio/voice, and video messages from your business number.
- List your approved message templates.
- Mark inbound messages as read.
- Send free-form messages outside WhatsApp’s 24-hour customer service window — those require an approved template.
- Create or approve templates (that happens in the Meta dashboard).
- Message numbers that haven’t opted in, or bypass Meta’s messaging policies.
- Access your Meta account settings or billing.
8. Troubleshooting
For general connector issues, see /mcp/integrations.
9. Frequently asked questions
Do I need approved templates to message customers? Yes — to start a conversation or message outside the 24-hour service window, WhatsApp requires a pre-approved template. Plain text messages only work within an open customer service window. Why does my access token keep expiring? You’re likely using a temporary token. Create a permanent System User access token in Meta Business Settings for production use. Is my customer message data stored by UnleashX? UnleashX sends messages on demand through Meta’s API. Inbound webhook events may be logged for delivery and analytics; outbound message content is not retained beyond what’s needed to complete the request. Can I use my own phone number? You use the business number registered to your WhatsApp Business Account in Meta. Thephone-number-id you provide tells UnleashX which number to send from.
10. References
- WhatsApp Cloud API documentation: https://developers.facebook.com/docs/whatsapp/cloud-api
- Get started / API Setup: https://developers.facebook.com/docs/whatsapp/cloud-api/get-started
- Message templates guide: https://developers.facebook.com/docs/whatsapp/business-management-api/message-templates
- System User access tokens: https://developers.facebook.com/docs/whatsapp/business-management-api/get-started